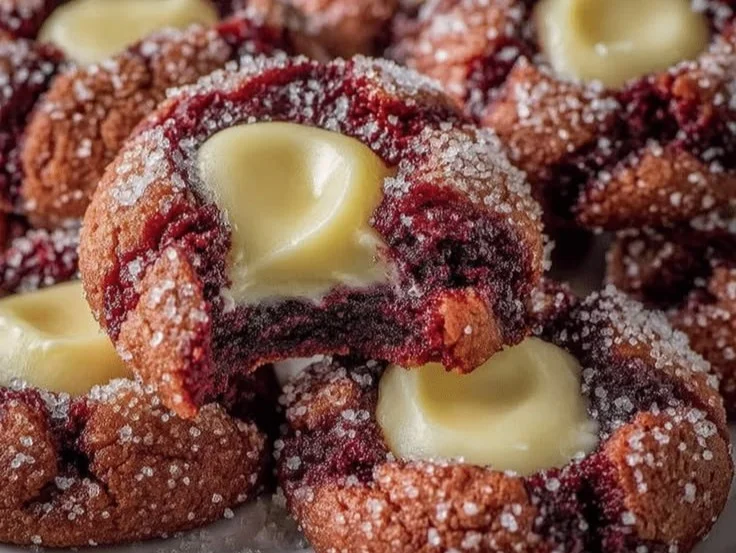
Easy Red Velvet Cheesecake Thumbprint Cookies for Holidays
Easy Red Velvet Cheesecake Thumbprint Cookies are soft red velvet cookies with a rich cheesecake center and tender crumb. These cookies balance cocoa, vanilla, and tangy cream cheese for a festive, elegant bite that holds up for parties and gift boxes. I include clear timing, reliable technique, and small variations to help you produce consistent results every bake. For a complementary treat idea, try pairing with chocolate-covered cheesecake strawberries for a coordinated dessert platter.
| Prep Time | Cook Time | Total Time | Servings | Difficulty | Cuisine |
|---|---|---|---|---|---|
| 30 minutes | 12-15 minutes per batch | 1 hour | 24 cookies | Easy | American |

Why This Recipe Works
This recipe yields tender, slightly cakey cookies with a creamy cheesecake center and reliable texture. The balanced fat from butter and cream cheese creates a soft snap around the edges while the cocoa and red coloring deliver classic red velvet character.
I developed this method after testing dough chilling times, thumbprint depth, and filling proportions to prevent leaks and overbrowning. The short chill firms the dough for neat thumbprints, and the small cheesecake dollops set without collapsing, which produces a consistent, attractive cookie every time.
Ingredients — Easy Red Velvet Cheesecake Thumbprint Cookies
This ingredient list covers every component required to make Red Velvet Cheesecake Thumbprint Cookies at home. I list simple swaps and notes to help you adapt the recipe for what you have in the pantry.
| Ingredient | Quantity | Notes with alternatives |
|---|---|---|
| All-purpose flour | 2 ½ cups (315 g) | Use 1:1 gluten-free flour blend for gluten-free cookies; texture will be slightly different |
| Unsweetened cocoa powder | 2 tbsp (15 g) | Use Dutch-process for deeper color and smoother flavor; natural cocoa works fine |
| Baking powder | 1 tsp (5 g) | Ensure fresh leavening for proper rise; substitute ¾ tsp baking soda plus 1 tsp cream of tartar |
| Unsalted butter, softened | 1 cup (227 g) | Room temperature butter creams best; salted butter can be used, reduce added salt elsewhere |
| Granulated sugar | 1 cup (200 g) | Fine sugar or caster sugar helps with smoother creaming and tender crumb |
| Large egg | 1 | Use room temperature egg for even mixing and better emulsion |
| Vanilla extract | 1 tsp (5 ml) | Pure vanilla provides depth; almond extract works for a different but pleasant profile |
| Red food coloring gel | 1 tbsp (15 ml) | Gel coloring gives intense color without thinning dough; beet powder for natural color reduces vibrancy |
| Cream cheese, softened | 8 oz (225 g) | Full-fat cream cheese yields best texture and flavor; Neufchâtel reduces richness slightly |
| Powdered sugar | ½ cup (60 g) | Sifted powdered sugar prevents lumps in the cheesecake filling |
| Heavy cream | 1 tbsp (15 ml) | Adjust to reach smooth filling; milk can be used but yields thinner texture |
Step-by-Step Instructions — Easy Red Velvet Cheesecake Thumbprint Cookies
Follow these steps in sequence to build the dough, prepare the filling, shape the cookies, and bake until the centers are set. I break the process into clear phases so you can follow along without confusion.
Phase 1: Prep Work
- Preheat the oven to 350°F (175°C) and line two baking sheets with parchment paper or silicone mats.
- Soften the butter and cream cheese at room temperature until they yield under light pressure.
Phase 2: Make the Cookie Dough
- Cream the butter and granulated sugar using an electric mixer on medium speed until light and fluffy, about three to four minutes.
- Add the egg and vanilla extract, mixing just until combined to maintain a tender crumb.
- Sift together the flour, cocoa powder, and baking powder into a separate bowl to remove lumps and blend dry ingredients evenly.
- Gradually add the dry ingredients to the wet mixture, mixing on low speed until just combined to avoid overworking the dough.
- Fold in the red food coloring gel evenly using a spatula until color is uniform without streaks.
- Wrap the dough tight in plastic wrap and chill in the refrigerator for twenty minutes to firm for shaping.
Phase 3: Prepare the Cheesecake Filling
- Beat the softened cream cheese with powdered sugar and heavy cream until smooth and creamy, scraping the bowl as needed.
- Chill the cheesecake filling briefly while you shape the cookies to help maintain filling shape during baking.
Phase 4: Shape, Fill, and Bake
- Scoop tablespoon-sized balls of dough and place them on the prepared baking sheets about two inches apart for even baking.
- Use your thumb or the back of a teaspoon to press a well into the center of each dough ball, creating a clear indentation.
- Fill each indentation with approximately half a teaspoon of the chilled cheesecake filling to avoid overflow during baking.
- Bake the cookies for twelve to fifteen minutes until the edges are set but the centers remain slightly soft to the touch.
- Let the cookies cool on the baking sheet for five minutes, then transfer to a wire rack to cool completely to prevent the centers from sinking.
Chef Tips for Perfect Results
- Use room-temperature butter and egg to ensure the dough emulsifies properly and yields a uniform texture during creaming.
- Measure flour by spooning it into the cup and leveling, or weigh for accuracy to prevent dense, dry cookies from too much flour.
- Keep cheesecake filling chilled until just before filling to maintain structure; over-soft filling can spread during baking.
- Create consistent thumbprints by using the same tool and pressure for each cookie so filling amounts and bake times stay uniform.
- Rotate baking sheets halfway through baking if your oven has hot spots to ensure even color and doneness across batches.
Common Mistakes to Avoid
Recognize and correct common pitfalls to maintain texture, shape, and flavor in every batch of cookies. Each note explains why the issue occurs and how to fix it for dependable results.
- Mistake: Dough too warm before shaping.
Why: Warm dough spreads excessively and loses indentations during baking. How to fix: Chill dough for the full twenty minutes or longer until firm but still pliable.
- Mistake: Overfilling thumbprints with cheesecake.
Why: Excess filling can leak and cause flat or overly moist cookies. How to fix: Use roughly half a teaspoon per cookie and keep filling cold to reduce spread.
- Mistake: Overmixing after adding dry ingredients.
Why: Overmixing develops gluten and creates tougher cookies. How to fix: Mix on low speed and stop when dry ingredients are just incorporated.
- Mistake: Using liquid food coloring instead of gel.
Why: Liquid color can alter dough hydration, affecting texture and spread. How to fix: Prefer gel food coloring or reduce other liquids slightly if using liquid coloring.
- Mistake: Baking too long until centers are hard.
Why: Overbaking removes tenderness and makes the cheesecake center grainy. How to fix: Remove cookies when edges set and centers are slightly soft, then cool on the sheet for five minutes.
Variations and Substitutions
Experiment confidently by swapping ingredients where needed, while understanding how each change affects flavor and texture. The table below summarizes practical substitutions and their likely impact.
| Ingredient | Substitution | Impact on Flavor |
|---|---|---|
| All-purpose flour | 1:1 gluten-free flour blend | Maintains structure but may yield slightly crumblier texture and different chew. |
| Cocoa powder | Dutch-process cocoa | Deeper, less acidic chocolate note and darker color, enhancing red contrast. |
| Red food coloring gel | Beet powder or natural red coloring | Provides natural tint with subtler hue and faint earthy flavor changes. |
| Cream cheese | Neufchâtel or mascarpone | Neufchâtel reduces richness slightly; mascarpone gives silkier, milder filling. |
| Granulated sugar | Light brown sugar (packed) | Introduces molasses notes and softer texture, altering classic red velvet profile. |
For more creative breakfast-to-dessert recipes that pair with red velvet flavors, consider exploring savory and sweet options in related collections like easy frittatas with potatoes, red peppers, and spinach.
Serving Suggestions and Pairings
Serve these cookies warm or cooled as a festive dessert at parties, gifting, or cozy gatherings, pairing with beverages that complement the cream cheese center. Suggested pairings enhance the red velvet and cheesecake contrast for varied occasions.
- Offer alongside fresh espresso or a vanilla latte for after-dinner desserts at dinner parties.
- Plate with chocolate-dipped strawberries or other fruit-forward sweets for holiday cookie platters and bake sale displays.
- Arrange in gift boxes with parchment and ribbon for hostess gifts during holidays and celebrations.
- Pair with chilled rosé or a creamy dessert wine for a refined tasting menu finale at small gatherings.
- Include as part of a brunch spread with light cheeses, fruit, and buttery scones for weekend entertaining.
For an elegant matching treat, present these cookies with a strawberry-cheesecake danish recipe for coordinated flavors and textures, ideal for special breakfasts and brunch spreads: easy strawberry cheesecake danish.
Storage and Reheating
Store and reheat these cookies to preserve texture and flavor, whether you plan to keep them at room temperature, refrigerate, or freeze. Follow the guidance below for the best results depending on your storage needs.
| Method | Duration | Instructions |
|---|---|---|
| Room temperature | 1-2 days | Keep in an airtight container layered with parchment to prevent sticking; avoid heat and humidity. |
| Refrigerator | 5-7 days | Store in an airtight container; let cookies sit at room temperature for twenty minutes before serving. |
| Freezer (unfilled) | Up to 3 months | Flash-freeze dough balls on a tray, then transfer to a sealed bag; bake from frozen, adding two to four minutes. |
| Freezer (baked) | Up to 3 months | Freeze completely cooled cookies in a single layer, then stack with parchment; thaw in the refrigerator overnight. |
| Reheating | 1-3 minutes | Warm in a 300°F oven for one to three minutes to refresh texture; avoid microwaving to prevent sogginess. |
For authoritative guidance on freezing and food safety, consult the USDA food preservation recommendations for reliable storage practices and timelines at USDA.
Nutritional Information
Approximate nutritional values per serving are provided for one cookie and are estimates calculated from the listed ingredients. Values vary by exact ingredient brands, portion size, and any substitutions you make.
| Nutrient | Amount per Serving (Approximate values) |
|---|---|
| Calories | 200 kcal |
| Total Fat | 11 g |
| Saturated Fat | 6 g |
| Carbohydrates | 24 g |
| Sugars | 12 g |
| Protein | 3 g |
| Sodium | 75 mg |
| Fiber | 1 g |
Frequently Asked Questions
Find clear, direct answers to common questions about making, storing, and troubleshooting these cookies. Each response gives practical next steps so you can bake confidently.
Can I substitute butter with margarine for these cookies?
Yes, you can substitute margarine for butter, but expect a slightly different texture and flavor because margarine contains more water. Butter provides a richer taste and better browning, while margarine may produce a softer, less flavorful cookie. When using margarine, ensure it is a baking stick-type with stable fat content for the best results.
How do I know when the thumbprint cookies are done baking?
Remove cookies when the edges are set and the centers remain slightly soft to the touch for perfectly baked results. The centers should not be liquid but should yield lightly when pressed to avoid overbaking. Allow the cookies to firm on the sheet for five minutes, which completes the setting process without drying them out.
What should I do if my cheesecake filling becomes grainy?
Stop whipping immediately and chill the filling to help it rehydrate and smooth out, which usually corrects minor graininess. If graininess persists, briefly beat in a teaspoon of cream or milk to restore sheen and texture. Use full-fat cream cheese and avoid overheating to minimize the risk of grainy filling.
Can I make the dough and filling ahead of time?
Yes, you can prepare both the dough and cheesecake filling up to two days ahead; wrap each tightly and refrigerate. Shape and bake the cookies on the day you plan to serve for best texture and fresh appearance. Alternatively, freeze shaped dough balls up to three months and bake from frozen for convenience.
What is the best way to serve these cookies at a party?
Arrange cookies on a shallow platter with contrasting garnishes like fresh berries and mint for visual appeal and balanced flavors. Serve room temperature or slightly chilled with small dessert plates and forks to allow guests to enjoy the creamy center without mess. Offer coffee, tea, or light wines that complement the cream cheese sweetness and mild cocoa notes.
For additional baking techniques and ingredient science, refer to respected culinary resources such as King Arthur Baking for mixing method insights at King Arthur Baking.
Conclusion
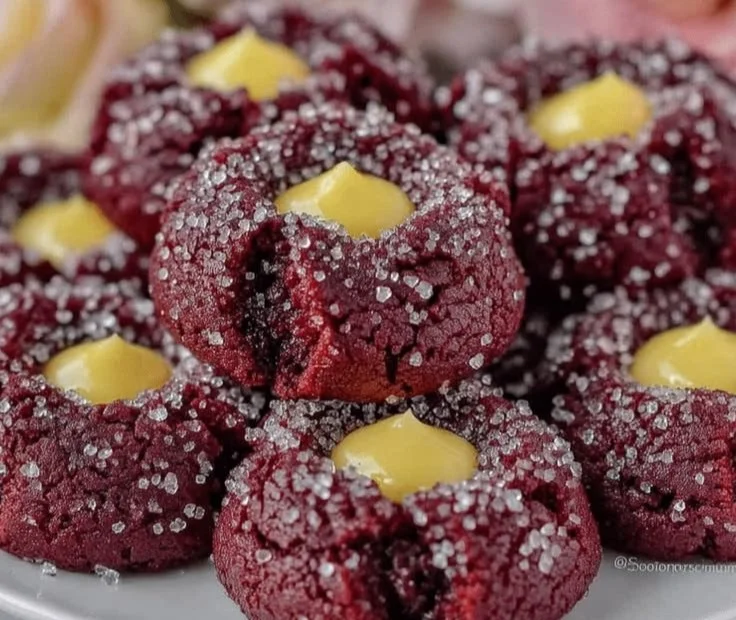
Easy Red Velvet Cheesecake Thumbprint Cookies combine soft red velvet dough and creamy cheesecake centers for a standout holiday cookie. The straightforward method, reliable timing, and simple tips ensure consistent batches you can feel confident about sharing. Try the variations and pairings suggested to highlight the signature red velvet and tangy cream cheese flavors for memorable seasonal treats.
Easy Red Velvet Cheesecake Thumbprint Cookies
Ingredients
For the Cookie Dough
- 2.5 cups All-purpose flour Use 1:1 gluten-free flour blend for gluten-free cookies; texture will be slightly different.
- 2 tbsp Unsweetened cocoa powder Use Dutch-process for deeper color and smoother flavor; natural cocoa works fine.
- 1 tsp Baking powder Ensure fresh leavening for proper rise; substitute ¾ tsp baking soda plus 1 tsp cream of tartar.
- 1 cup Unsalted butter, softened Room temperature butter creams best; salted butter can be used, reduce added salt elsewhere.
- 1 cup Granulated sugar Fine sugar or caster sugar helps with smoother creaming and tender crumb.
- 1 large Egg Use room temperature egg for even mixing and better emulsion.
- 1 tsp Vanilla extract Pure vanilla provides depth; almond extract works for a different but pleasant profile.
- 1 tbsp Red food coloring gel Gel coloring gives intense color without thinning dough; beet powder for natural color reduces vibrancy.
For the Cheesecake Filling
- 8 oz Cream cheese, softened Full-fat cream cheese yields best texture and flavor; Neufchâtel reduces richness slightly.
- ½ cup Powdered sugar Sifted powdered sugar prevents lumps in the cheesecake filling.
- 1 tbsp Heavy cream Adjust to reach smooth filling; milk can be used but yields thinner texture.
Instructions
Phase 1: Prep Work
- Preheat the oven to 350°F (175°C) and line two baking sheets with parchment paper or silicone mats.
- Soften the butter and cream cheese at room temperature until they yield under light pressure.
Phase 2: Make the Cookie Dough
- Cream the butter and granulated sugar using an electric mixer on medium speed until light and fluffy, about three to four minutes.
- Add the egg and vanilla extract, mixing just until combined to maintain a tender crumb.
- Sift together the flour, cocoa powder, and baking powder into a separate bowl to remove lumps and blend dry ingredients evenly.
- Gradually add the dry ingredients to the wet mixture, mixing on low speed until just combined to avoid overworking the dough.
- Fold in the red food coloring gel evenly using a spatula until color is uniform without streaks.
- Wrap the dough tight in plastic wrap and chill in the refrigerator for twenty minutes to firm for shaping.
Phase 3: Prepare the Cheesecake Filling
- Beat the softened cream cheese with powdered sugar and heavy cream until smooth and creamy, scraping the bowl as needed.
- Chill the cheesecake filling briefly while you shape the cookies to help maintain filling shape during baking.
Phase 4: Shape, Fill, and Bake
- Scoop tablespoon-sized balls of dough and place them on the prepared baking sheets about two inches apart for even baking.
- Use your thumb or the back of a teaspoon to press a well into the center of each dough ball, creating a clear indentation.
- Fill each indentation with approximately half a teaspoon of the chilled cheesecake filling to avoid overflow during baking.
- Bake the cookies for twelve to fifteen minutes until the edges are set but the centers remain slightly soft to the touch.
- Let the cookies cool on the baking sheet for five minutes, then transfer to a wire rack to cool completely to prevent the centers from sinking.