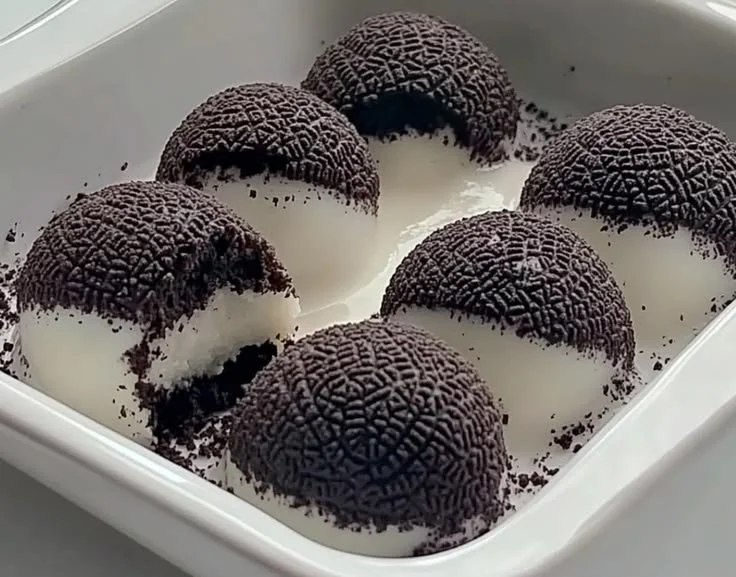
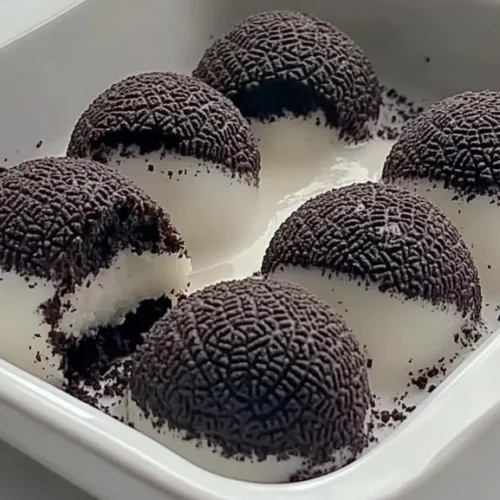
Oreo Mochi Delight: A Sweet Treat You Can’t Resist
Oreo Mochi is a delightful fusion of traditional Japanese mochi and the beloved Oreo cookie. This treat combines the chewy texture of mochi with the rich flavors of crushed Oreo cookies, creating a unique dessert that satisfies both mochi and cookie lovers alike. Whether served at a gathering or enjoyed as a snack, Oreo Mochi is sure to impress.
Prep TimeCook TimeTotal TimeServingsDifficultyCuisine10 minutes5 minutes15 minutes10 servingsEasyJapanese-inspired Why This Recipe Works
This Oreo Mochi recipe combines simple ingredients in a way that showcases the chewy texture of mochi while infusing it with the creamy, chocolaty flavors of Oreos. As a cooking enthusiast, I appreciate how this dish merges two culinary worlds, making dessert a fun and interactive experience.
Using glutinous rice flour instead of regular flour ensures that the mochi has the authentic chewy texture we want. The microwave method is quick and effective, allowing for an easy preparation that’s perfect for any home cook.
Ingredients
IngredientQuantityNotesGlutinous rice flour1 cupCan substitute with sweet rice flour for similar texture.Sugar1/4 cupGranulated sugar works best, but you can use sweeteners like stevia.Water1 cupAdjust water for mochi firmness to your preference.Crushed Oreo cookies1/2 cupStandard Oreo or any other chocolate sandwich cookie can be used.CornstarchFor dustingPrevents sticking; can use potato starch if preferred.Extra Oreos for fillingOptionalGreat for added flavor; choose either regular or flavored Oreos. 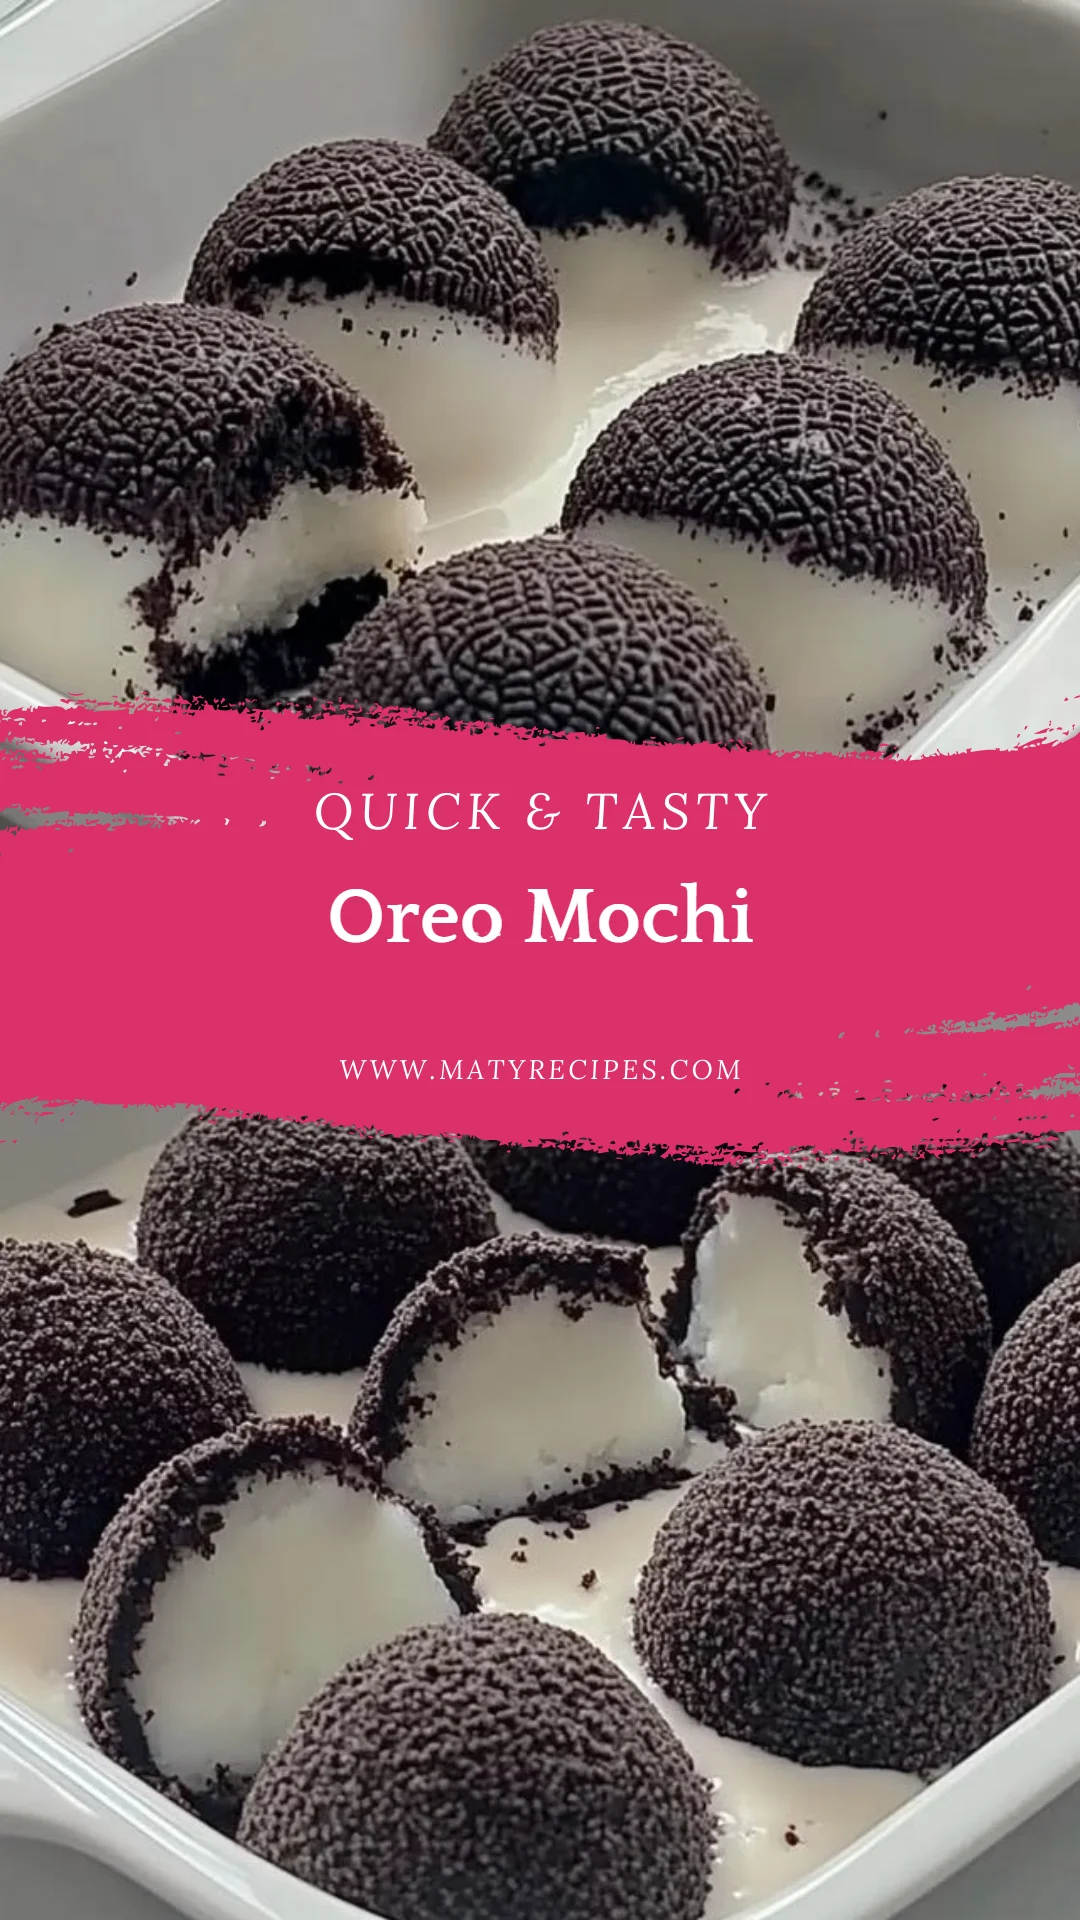
Step-by-Step Instructions
Mix Dry Ingredients
- In a bowl, mix the glutinous rice flour and sugar until well combined.
Prepare the Wet Mixture
- Gradually add the water while stirring until the mixture is smooth and free from lumps.
Microwave the Mixture
- Pour the mixture into a microwave-safe dish and microwave on high for 1-2 minutes.
Stir and Thicken
- Stir the mixture every 30 seconds until it thickens to a sticky consistency.
Add Oreos
- Once thickened, mix in the crushed Oreo cookies until evenly distributed.
Prepare the Surface
- Dust a clean surface with cornstarch to prevent sticking.
Pour and Cool
- Pour the mochi mixture onto the prepared surface and allow it to cool slightly.
Knead Gently
- Once cool enough to handle, knead the mochi gently until it becomes smooth.
Shape the Mochi
- Cut the mochi into small pieces and shape each into balls; add an Oreo piece in the center if desired.
Finish with Cornstarch
- Dust each mochi ball with cornstarch to prevent sticking.
Serve
- Enjoy your delicious Oreo Mochi as is or with a side of your favorite dip!
Chef Tips for Perfect Results
- Use fresh glutinous rice flour for the best texture and taste.
- Adjust the amount of sugar based on your sweet preference.
- Ensure you stir the mixture thoroughly every 30 seconds while microwaving for even cooking.
- For a fun twist, try using different flavored Oreos, such as mint or peanut butter.
- Store any leftover mochi in an airtight container to maintain freshness.
Common Mistakes to Avoid
- Not stirring enough while microwaving can cause uneven cooking; always stir every 30 seconds.
- Using too much water can lead to a watery mixture; gradually add water until you reach a smooth consistency.
- Over-kneading can make the mochi tough; knead gently just until smooth.
- Not dusting with cornstarch can result in the mochi sticking together; be generous when dusting.
Variations and Substitutions
IngredientSubstitutionImpact on FlavorGlutinous rice flourRegular rice flourTexture may be less chewy.OreosAny chocolate cookieFlavors will vary; choose cookies that have a strong chocolate taste.SugarHoney or agave syrupWill add a different sweetness and taste profile. Serving Suggestions and Pairings
Oreo Mochi pairs well with various beverages, including iced tea or even coffee for a pick-me-up. Serve it at parties, potlucks, or as a special treat for family game nights. For a complete dessert experience, consider offering a selection alongside the delightful Oreo cheesecake bars.
Storage and Reheating
MethodDurationInstructionsRefrigeratorUp to 3 daysStore in an airtight container to maintain freshness.FreezerUp to 1 monthFreeze in individual portions; thaw in the refrigerator before serving.Reheating1-2 minutesMicrowave on low heat, ensuring not to overheat. Nutritional Information
NutrientAmount per ServingCalories100Protein1.5gFat2.5gCarbohydrates20gSugar3g Frequently Asked Questions
Can I substitute the glutinous rice flour?
Yes, you can use sweet rice flour for a similar texture. However, regular rice flour will yield a different consistency and may not provide the chewy texture characteristic of mochi.
How do I know if the mochi is done?
The mochi is done when it becomes thick and sticky. Stir it often in the microwave. It should not be liquid and should form a dough-like consistency.
What do I do if my mochi is too sticky?
If your mochi is too sticky, dust more cornstarch on your hands and the working surface. Adding a bit more cornstarch while kneading can help mitigate stickiness.
Can I make Oreo Mochi ahead of time?
Yes, you can prepare Oreo Mochi a day in advance. Store it in an airtight container in the refrigerator, and it will stay fresh for several days.
What’s the best way to serve Oreo Mochi?
Oreo Mochi can be served as a standalone dessert or alongside coffee or tea for a comforting treat. Consider pairing it with light desserts like fruit for added freshness.
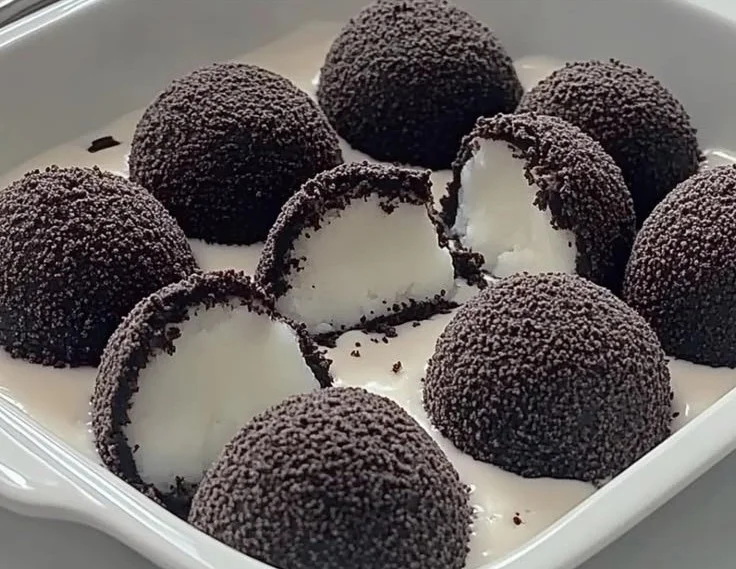

Oreo Mochi presents a unique dessert experience, combining chewy, sweet, and chocolatey flavors in each bite. This recipe is perfect for those looking to explore the delightful world of mochi, enhanced by the nostalgic taste of Oreos. Enjoy this sweet treat at your next gathering or simply as a special reward for yourself!
Oreo Mochi
Ingredients
For the Mochi
- 1 cup Glutinous rice flour Can substitute with sweet rice flour for similar texture.
- 1/4 cup Sugar Granulated sugar works best, but you can use sweeteners like stevia.
- 1 cup Water Adjust water for mochi firmness to your preference.
- 1/2 cup Crushed Oreo cookies Standard Oreo or any other chocolate sandwich cookie can be used.
- Cornstarch For dusting; prevents sticking; can use potato starch if preferred.
- Extra Oreos for filling Optional; great for added flavor; choose either regular or flavored Oreos.
Instructions
Preparation
- In a bowl, mix the glutinous rice flour and sugar until well combined.
- Gradually add the water while stirring until the mixture is smooth and free from lumps.
- Pour the mixture into a microwave-safe dish and microwave on high for 1-2 minutes.
- Stir the mixture every 30 seconds until it thickens to a sticky consistency.
- Once thickened, mix in the crushed Oreo cookies until evenly distributed.
- Dust a clean surface with cornstarch to prevent sticking.
- Pour the mochi mixture onto the prepared surface and allow it to cool slightly.
- Once cool enough to handle, knead the mochi gently until it becomes smooth.
- Cut the mochi into small pieces and shape each into balls; add an Oreo piece in the center if desired.
- Dust each mochi ball with cornstarch to prevent sticking.
- Enjoy your delicious Oreo Mochi as is or with a side of your favorite dip!