Gipfeli, a beloved Swiss pastry, often stands in the shadow of its more famous cousin, the croissant. Despite their similar appearance, these two pastries are remarkably different. Gipfeli has a unique flavor, texture, and preparation process that make it a must-try for any pastry lover. Whether you’ve tried it in Switzerland or are new to it, this recipe will guide you through making gipfeli at home. Not only will we explore the process of creating this delicious pastry, but we’ll also dive into what makes it special, how to perfect it, and variations that will delight any baker.

What is Gipfeli and How Does It Differ from a Croissant?
If you’ve ever tasted a croissant and enjoyed its buttery, flaky layers, you’re probably familiar with gipfeli’s close resemblance. However, there are key differences between these two pastries, both in taste and texture. The primary difference lies in the dough used for each pastry.
While a croissant uses a very layered dough, gipfeli is slightly denser and typically less flaky. The layers in gipfeli dough are not as numerous, but the pastry is still delightfully soft with a rich buttery flavor. This makes gipfeli an excellent choice for those who prefer a heartier, bread-like texture, but still crave the same indulgent flavor found in croissants.
Unlike croissants, which require multiple layers of dough folded together, gipfeli dough is simpler, made with just a few folds. These folds create enough structure for a soft, tender crumb while ensuring a satisfying bite without being overly airy. This slight density means gipfeli also holds up better to fillings, making it more versatile if you want to experiment with sweet or savory options.
Gipfeli is enjoyed throughout Switzerland, typically as a breakfast pastry or snack, often accompanied by coffee or tea. Many Swiss families take pride in their recipe variations, sometimes including ingredients such as almond paste or jam for an extra touch of sweetness.
How to Make the Perfect Gipfeli Recipe at Home
Making gipfeli from scratch is not as difficult as it may seem. With just a few ingredients and some time, you can create these mouthwatering pastries in your own kitchen. Below is a step-by-step guide to preparing gipfeli dough and baking it to perfection.
Ingredients for the Gipfeli Dough
First, let’s take a look at the ingredients you will need. The dough for gipfeli is relatively simple, but the quality of your ingredients plays a significant role in the final result.
| Ingredient | Amount | Notes |
|---|---|---|
| All-purpose flour | 500g | Choose unbleached flour for the best texture. |
| Salt | 1 tsp | |
| Sugar | 2 tbsp | Adds a touch of sweetness to balance the buttery dough. |
| Dry yeast | 7g | Use active dry yeast for the best rise. |
| Unsalted butter | 250g | Cold butter is essential to create flakiness. |
| Milk | 200ml | Ensure it’s lukewarm to activate the yeast. |
| Water | 100ml | Lukewarm water helps bring the dough together. |
Table of Contents
With these ingredients, you’re ready to start creating your dough.
Instructions for Preparing Gipfeli
Step 1: Mixing the Dough
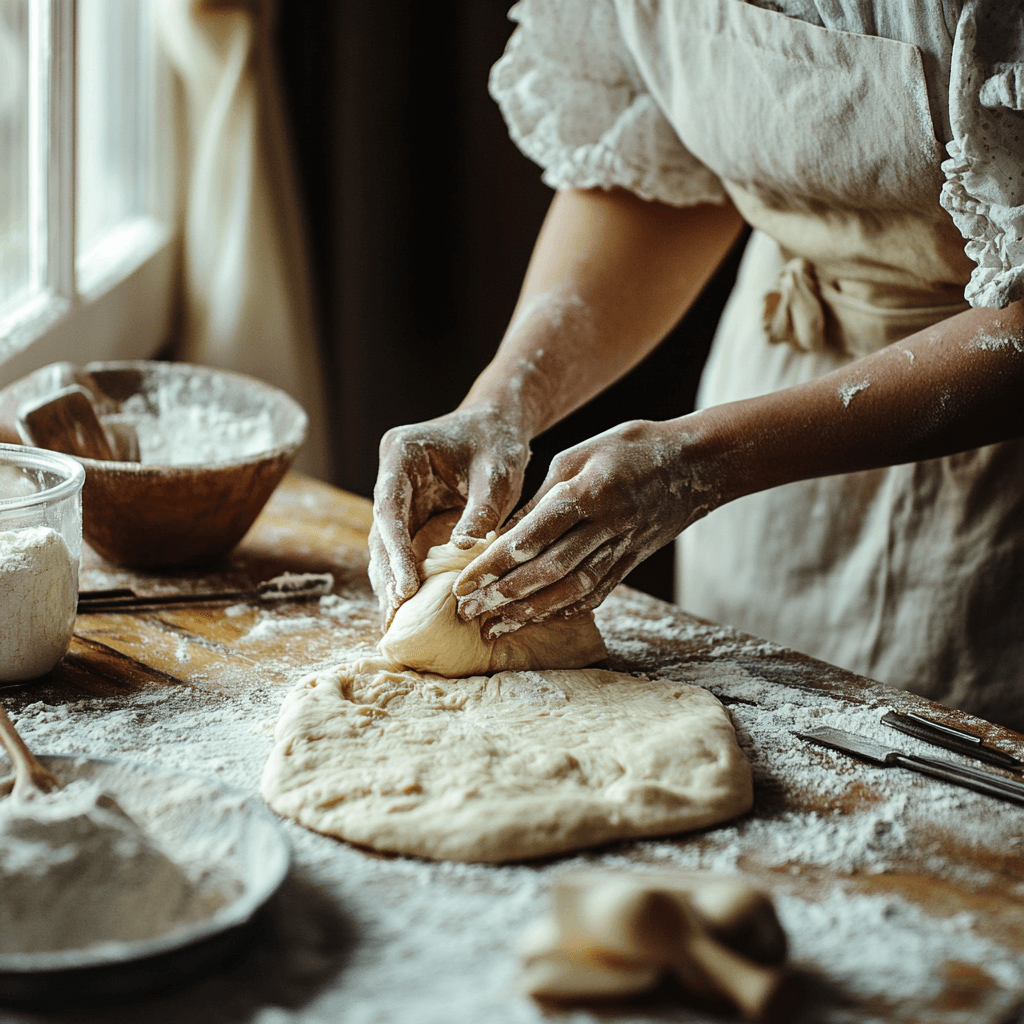
Begin by mixing the dry ingredients — flour, sugar, and salt — in a large bowl. In another bowl, dissolve the dry yeast in warm milk and water, letting it sit for 5 minutes to activate. You should see the mixture bubble slightly, confirming that the yeast is alive. Once activated, pour the yeast mixture into the dry ingredients.
Cut the cold butter into cubes and add them to the mixture. Using your hands or a pastry cutter, work the butter into the flour mixture. The goal is to distribute the butter evenly without melting it, which will help create flaky layers when baked.
Step 2: Kneading and Resting the Dough
Knead the dough until it begins to form a rough ball, adding small amounts of water if necessary. Once the dough comes together, cover it with a clean kitchen towel and let it rest for 30 minutes at room temperature. This resting period is important as it allows the dough to relax, making it easier to roll out later.
Step 3: Rolling and Folding
After the dough has rested, transfer it to a lightly floured surface. Roll it into a rectangular shape about ½ inch thick. Next, fold the dough in thirds, like a letter. Rotate the dough 90 degrees and roll it out again. Repeat this folding and rolling process two more times. Between each fold, chill the dough for 20 minutes to allow the butter to stay cold. This process will create the layers that give gipfeli its distinctive texture.
Step 4: Shaping the Gipfeli
Roll the dough out to about ¼ inch thick and cut it into triangles. Starting at the wide end of each triangle, roll it up tightly towards the point. Pinch the edges to seal them tightly, forming the crescent shape typical of gipfeli.
Step 5: Proofing the Gipfeli
Place the shaped gipfeli onto a baking sheet lined with parchment paper. Cover the tray with a kitchen towel and let them proof for about 1 hour, or until they have doubled in size. This final rise is essential for achieving the light and airy texture inside the pastry.
What is the Secret to a Perfect Gipfeli?
The secret to a perfect gipfeli lies in two essential factors: the dough and the proofing process.
- Cold Butter: The key to flaky, tender layers is cold butter. When you incorporate the butter into the dough, the cold butter creates pockets of steam as it melts during baking, which leads to a flaky texture. Always use cold, unsalted butter for the best results.
- Proper Proofing: Don’t rush the proofing time. Allowing the dough to rise properly ensures that the yeast has enough time to activate and form air pockets, resulting in a lighter and more flavorful pastry. If you’re short on time, you can also prepare the dough the day before and let it rest overnight in the fridge, allowing the dough to develop even more flavor.
Additionally, avoid overworking the dough during rolling and folding. Too much handling can cause the dough to become tough, which affects the texture of your gipfeli. Gentle handling will ensure a delicate, tender pastry.
Can You Make Gipfeli Dough Ahead of Time?
Absolutely! One of the great things about gipfeli dough is that it can be made ahead of time. After mixing and kneading the dough, wrap it tightly in plastic wrap and refrigerate it for up to 24 hours. The slow fermentation process in the fridge enhances the flavor and makes the dough easier to handle. When you’re ready to bake, simply shape the dough into gipfeli, let them proof for an hour, and bake.
This make-ahead method is perfect for busy mornings or special occasions, as you can have fresh gipfeli ready to bake without starting from scratch each time.
What Ingredients Are In a Gipfeli?
The basic ingredients for gipfeli are flour, yeast, butter, sugar, and salt, which come together to create a soft, flaky pastry. However, gipfeli is quite versatile, and you can experiment with fillings to make them even more delicious.
- Sweet Fillings: A popular variation is to add chocolate chips, almond paste, or fruit preserves inside the dough before rolling it up. These fillings add a burst of flavor and make gipfeli a more indulgent treat.
- Savory Fillings: If you prefer a savory option, consider adding ham, cheese, or even fresh herbs to the dough before baking. These savory variants are a fantastic choice for a brunch or lunch gathering.
Gipfeli is an incredibly adaptable pastry, so feel free to get creative with your ingredients.

How Long Should You Let Gipfeli Dough Rise?
Gipfeli dough requires about 1 hour of proofing time to reach its full potential. This allows the yeast to work its magic, causing the dough to double in size. If you’re planning to let the dough rise longer, you can refrigerate it for an extended period (up to 24 hours), which will give the dough more time to develop flavor. However, don’t let it rise too much, as it can affect the texture and make the dough too soft to handle.
Remember, proper proofing time is essential for light and airy gipfeli, so don’t skip this crucial step.
How to Make Gipfeli Step-by-Step (Continued)
Now that we’ve covered the initial stages of preparing your gipfeli dough, let’s dive deeper into the important final steps. In this section, we’ll go through the critical processes of proofing, baking, and finishing your gipfeli, ensuring that your pastries come out perfectly golden and delicious.
Step 6: Proofing the Gipfeli
Proofing is the step where the magic happens—this is when the dough rises, giving the gipfeli its airy texture. After shaping the dough into crescents, you’ll need to place the rolled pastries on a baking sheet lined with parchment paper. Cover them lightly with a clean towel and let them rest in a warm, draft-free area for about 1 hour, or until they have doubled in size.
During this time, the yeast will continue to work, producing gases that create air pockets in the dough. This is crucial for achieving that signature light and fluffy texture inside the gipfeli. If you rush this step, your gipfeli will be dense and not nearly as flavorful.
Pro Tip: If you’re making your dough ahead of time, you can refrigerate the shaped gipfeli overnight. This extended proofing time can enhance the flavor, making the gipfeli even more delicious when baked.
Step 7: Baking the Gipfeli
Once your gipfeli have proofed and doubled in size, it’s time to bake them to perfection. Preheat your oven to 375°F (190°C) and prepare an egg wash to brush over the tops of the pastries. An egg wash, which is made by mixing a beaten egg with a bit of water, helps give your gipfeli a beautiful, glossy finish and a golden-brown color.
Place your baking sheet in the oven and bake the gipfeli for 15-20 minutes. You’ll know they are ready when they turn golden brown and emit a rich, buttery aroma. Keep an eye on them in the final minutes of baking to prevent burning. If you’re unsure, you can gently tap the bottom of one—if it sounds hollow, that means they are perfectly baked.

Step 8: Cooling and Serving
Once baked, remove the gipfeli from the oven and place them on a wire rack to cool slightly. This cooling period helps set the pastry and allows the flavors to settle. Gipfeli are best enjoyed warm, right out of the oven, though they can also be stored in an airtight container for a few days.
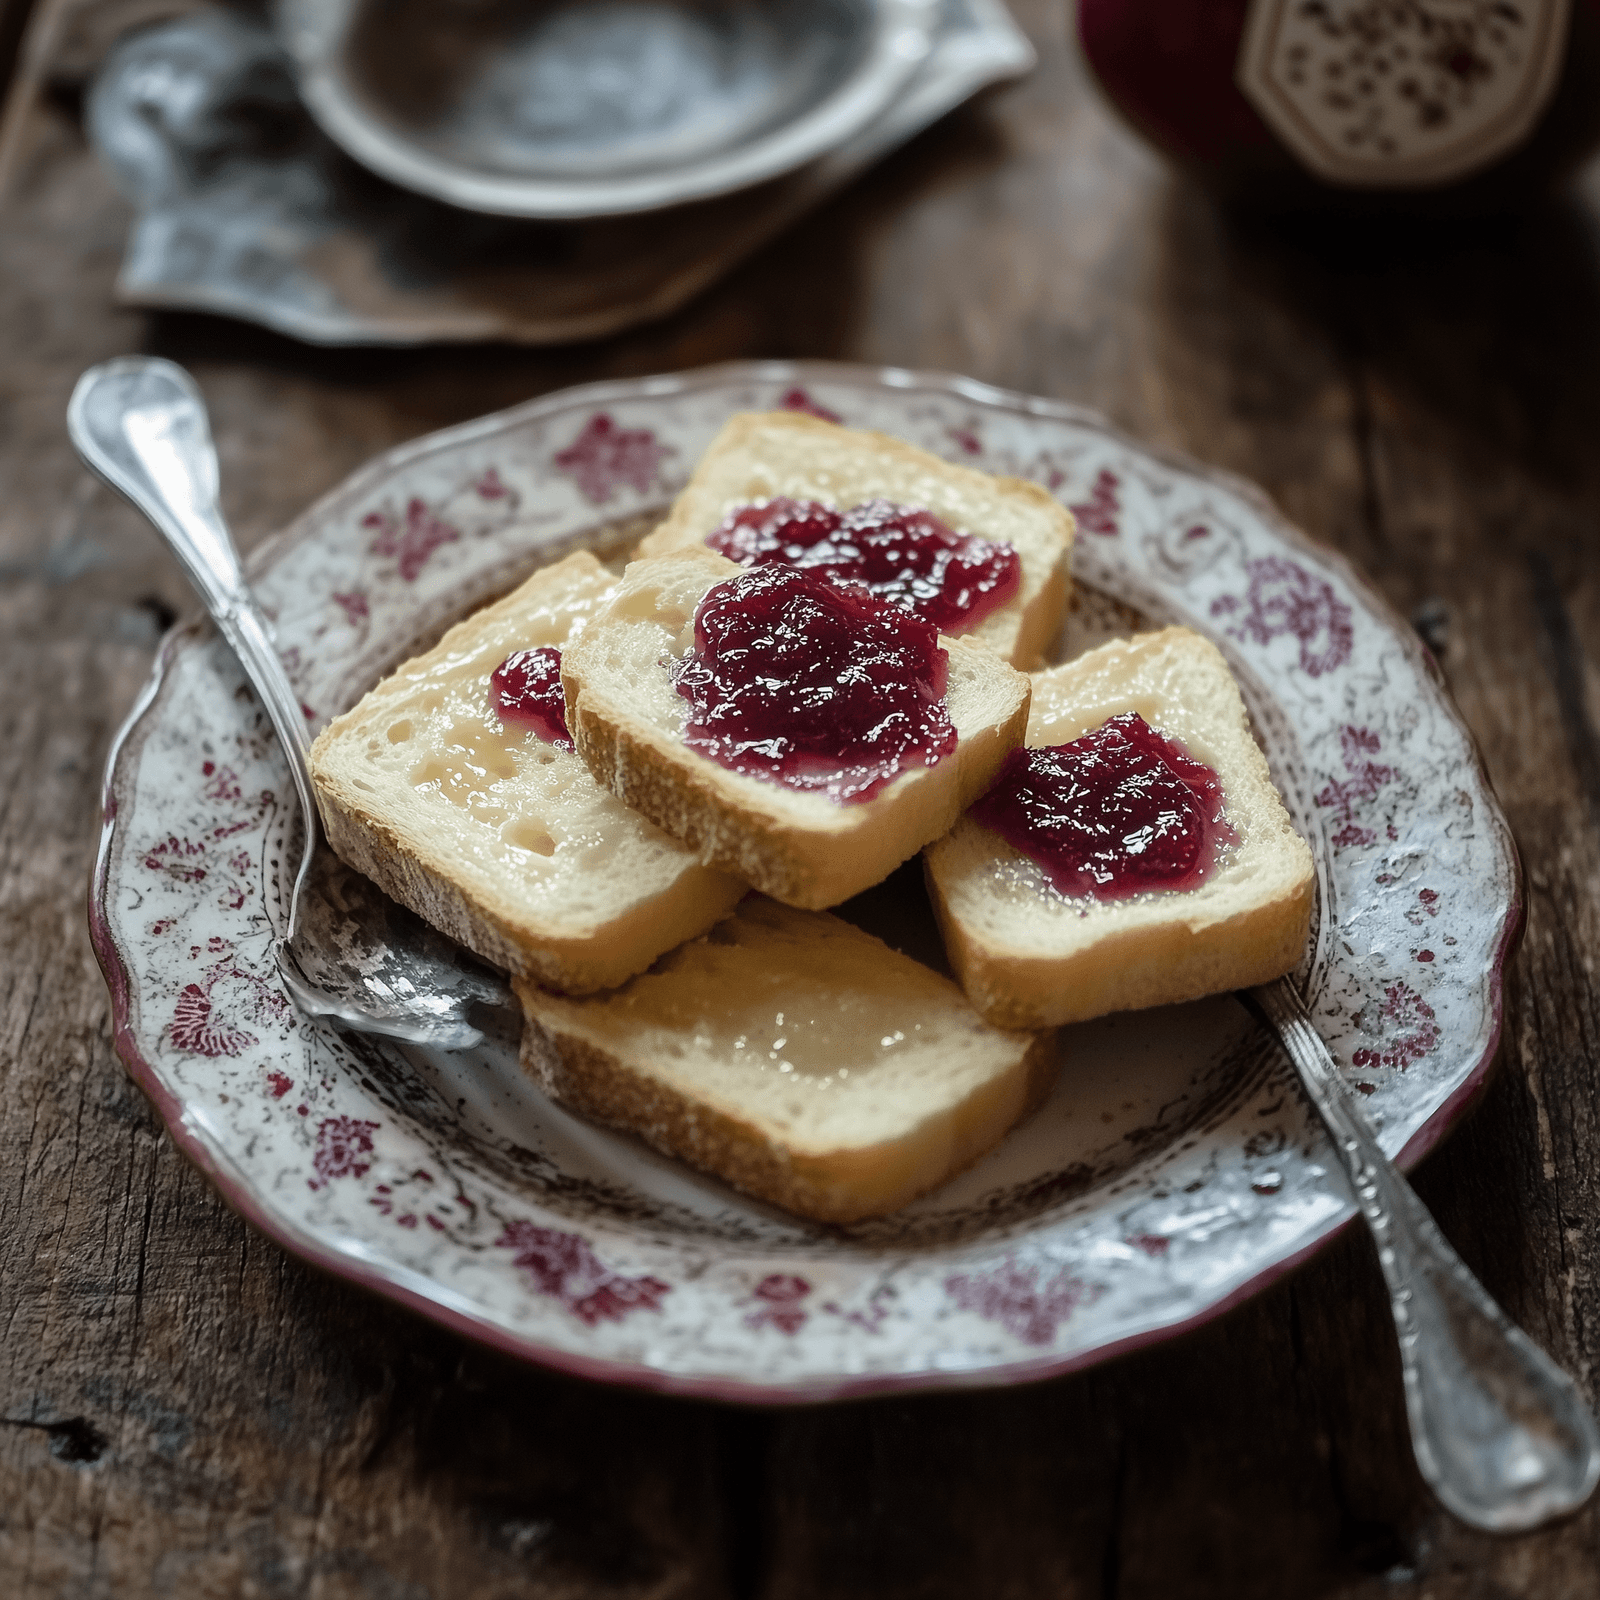
These delightful pastries can be served on their own, alongside a cup of coffee, or with various spreads like butter, jam, or Nutella for an indulgent treat. If you’ve added fillings, be careful when handling them as they may be filled with hot contents.
Pro Tips & Variations for Gipfeli
There are numerous ways to customize your gipfeli recipe, whether you’re craving something sweet or savory. Below, we’ll explore some tips and variations that can add an extra layer of flavor and creativity to your baking experience.
Sweet Fillings for Gipfeli
Gipfeli dough serves as a perfect base for a variety of sweet fillings. Whether you’re a fan of rich chocolate or fruity spreads, these variations will take your gipfeli to the next level.
- Chocolate Chips: Add a handful of dark or milk chocolate chips to the dough before rolling. When baked, the chocolate melts to create a gooey, indulgent center that’s hard to resist.
- Fruit Preserves: Spread your favorite fruit jam, such as raspberry, apricot, or strawberry, inside the dough before rolling it up. The sweet, tangy filling pairs wonderfully with the buttery pastry.
- Cinnamon Sugar: For a twist on a classic cinnamon roll, sprinkle a mix of cinnamon and sugar on the dough before rolling it up. The result is a sweet, spiced gipfeli perfect for breakfast.
These sweet variations are perfect for serving as a dessert or a special breakfast treat.
Savory Fillings for Gipfeli
If you prefer a savory snack, you can easily transform your gipfeli into a delicious savory pastry. Here are some ideas:
- Cheese and Ham: Layer thin slices of ham and cheese inside the dough before rolling it up. Once baked, the cheese melts, creating a savory, gooey center that pairs perfectly with the buttery pastry.
- Garlic and Herb Butter: For a more fragrant and flavorful option, brush the dough with garlic and herb-infused butter before folding. This imparts a wonderful savory flavor to the gipfeli, making it an excellent choice for a brunch or appetizer.
- Spinach and Feta: For a Mediterranean-inspired gipfeli, try adding a mixture of spinach and feta cheese inside the dough. This savory option will provide a flavorful contrast to the buttery, flaky pastry.
By experimenting with different fillings, you can customize the gipfeli to suit any occasion or taste preference, making it as versatile as it is delicious.

FAQs: All Your Gipfeli Questions Answered
What is the difference between a croissant and a gipfeli?
At first glance, gipfeli and croissants may look similar, but they differ significantly in terms of texture and preparation. Croissant dough is made through a process known as lamination, where multiple layers of dough and butter are folded together to create a flaky texture. In contrast, gipfeli uses a simpler dough with fewer layers, resulting in a denser, bread-like texture. Gipfeli also tends to be slightly less flaky but has a richer, more substantial bite.
What is the secret to a good croissant?
The secret to a good croissant, and similarly, a perfect gipfeli, is the dough. For a croissant, the dough must be chilled and handled carefully to ensure the butter stays cold and forms distinct layers during baking. In the case of gipfeli, using cold butter and allowing the dough enough time to rise are key factors that contribute to its delicate texture and flavor.
What ingredients are in a gipfeli?
A traditional gipfeli recipe contains the following ingredients:
- Flour: All-purpose flour works best for a soft, tender crumb.
- Butter: Unsalted butter is essential to achieving the rich flavor and flaky texture.
- Sugar: A small amount of sugar adds a subtle sweetness that complements the butter.
- Salt: Enhances the flavor of the dough and balances the sweetness.
- Yeast: Active dry yeast helps the dough rise, creating the soft texture.
Many variations involve additional ingredients, such as chocolate, fruit preserves, or savory fillings like cheese and ham.
Is croissant dough just puff pastry?
While croissant dough and puff pastry share similarities, they are not the same. Both are made with layers of dough and butter, but croissant dough includes yeast, which helps it rise and gives it a soft, airy texture. Puff pastry, on the other hand, is made without yeast and is purely based on the layers of butter and dough. This results in a crisper, flakier texture.
Can I make gipfeli dough ahead of time?
Yes! You can prepare the dough for gipfeli ahead of time. After kneading the dough, wrap it tightly in plastic wrap and refrigerate it for up to 24 hours. The extended resting period enhances the flavor and makes the dough easier to handle. When you’re ready to bake, shape the dough, allow it to proof, and bake as usual.
How long should you let gipfeli dough rise?
Gipfeli dough should rise for at least 1 hour. This allows the yeast to activate and causes the dough to double in size. If you have time, you can let it rise for longer, which will develop more flavor and make the gipfeli lighter and fluffier. Some bakers even opt for an overnight rise in the refrigerator.
Conclusion
Gipfeli is a wonderfully versatile Swiss pastry that combines rich butteriness, delicate layers, and endless possibilities for variation. Whether you prefer the traditional plain gipfeli or want to experiment with sweet and savory fillings, this recipe is sure to become a favorite in your baking repertoire.
By following the detailed steps in this guide, you’ll be able to create delicious gipfeli at home, perfect for breakfast, brunch, or a special treat. With its golden exterior and soft, tender interior, gipfeli will be a hit with everyone who tries it.
So go ahead—roll up your sleeves, try your hand at this Swiss classic, and enjoy the satisfaction of homemade gipfeli fresh from the oven.
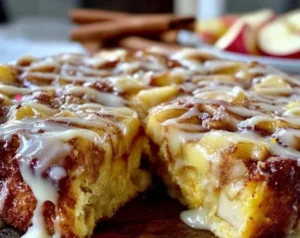
For more croissant recipes, check out this one: Croissant French Toast Bake